
If you live in an area like me; Facebook Marketplace, Craigslist and every secondhand store has a huge excess of unwanted bikes. Now don’t get me wrong, most rightfully deserve to be there and even more deserve to be in a garbage dump. Occasionally though you will find a bike/frame that isn’t overpriced and is worth building up. Whether because of scratches, rust, or that you just don’t like the color you decide to try painting it!

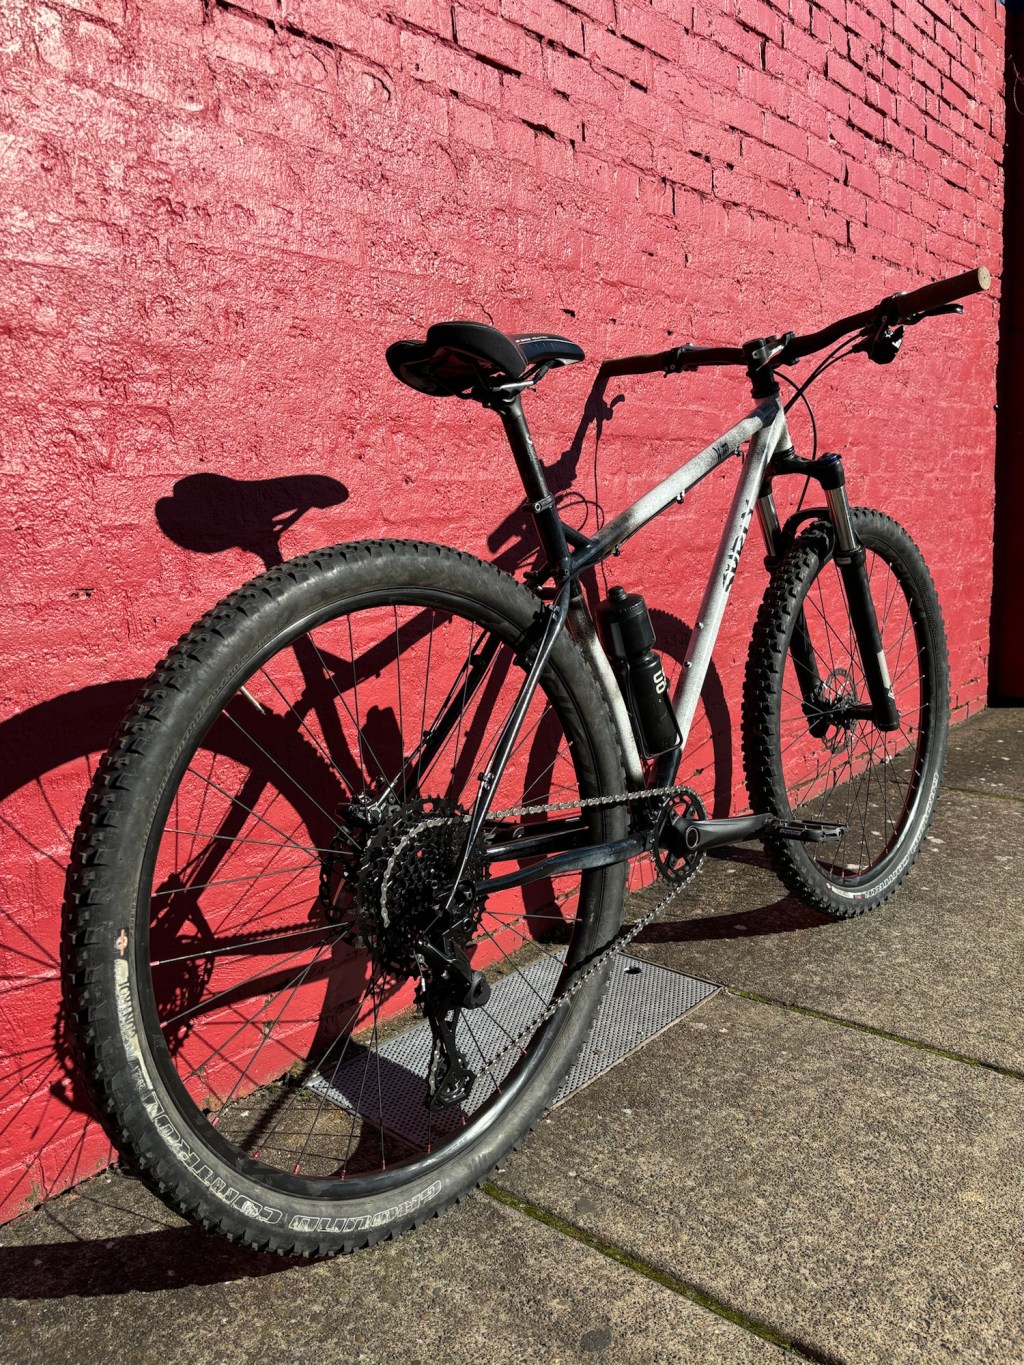
The bike in question is a 2012 Surly Karate Monkey I got on Facebook Marketplace for $400. I had never owned a 29” MTB so it was a ton of fun to go out and ride it but I knew it was going to need love (fork service, new cassette/crankset and a lot more) and on top of all the things going on it had been haphazardly spray painted a matte black.
I decided first of the year to paint the Surly frame (subject of this article) and felt pretty scared going into it. As I am sure a lot of you have felt thinking about it yourself there is a lot of pressure to mess up. I am pretty picky about my stuff and would be very critical of my own work. Honestly though it was much easier than anticipated because of a couple tips I learned and made sure to follow. Before I give those tips let’s first dive into the process I followed to prep, prime, paint, and gloss coat the bike.
NOTE three important things before you continue reading this article. First, a DIY paint job will never even come close to a professional paint job but it also won’t be $1000+ like the quotes I got, as long as your expectations are reasonable you’ll be very happy with the results. Second, mistakes will most likely happen or even if you do it all the “right way” it may still not look as good as you want. I would highly recommend for these reasons to try the first time on a frame you won’t be too bothered by if it’s not a mint paint job or you have to pivot the design part way through (like I did). Third and most important point to be made, please wear a respirator when painting, this stuff is nasty and will wreck your lungs, you can get one at Harbor Freight for $18.99. You only get one set of lungs, plus, you get to sound like Darth Vader so that’s cool.
As a student of YouTube and the interwebs in general I researched and learned from a lot of places but the one source I learned the most from is the video below!
I will also summarize what I learned from Martin (ETOE on YouTube) but wanted to give credit and a massive shoutout to him. I don’t think it would have come out even a 1/10th of as good as it did without watching his video like five or six times.
Prep
Unfortunately, like most things in life the boring or hard things take the longest but this will be the deciding factor on if your paint sticks (adheres) well to the bike and comes out looking good.
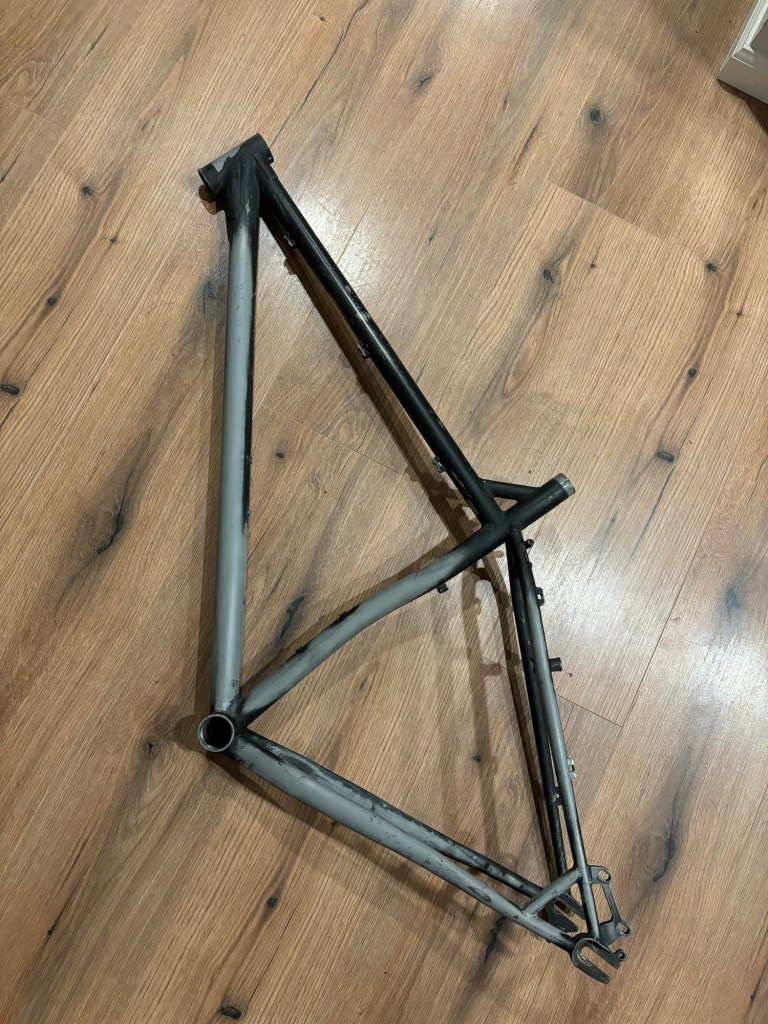
First things first you need to breakdown your bike down to just the frame, if you don’t have the tools, take it to your LBS (local bike shop) and they should be able to help for a couple bucks (or free).
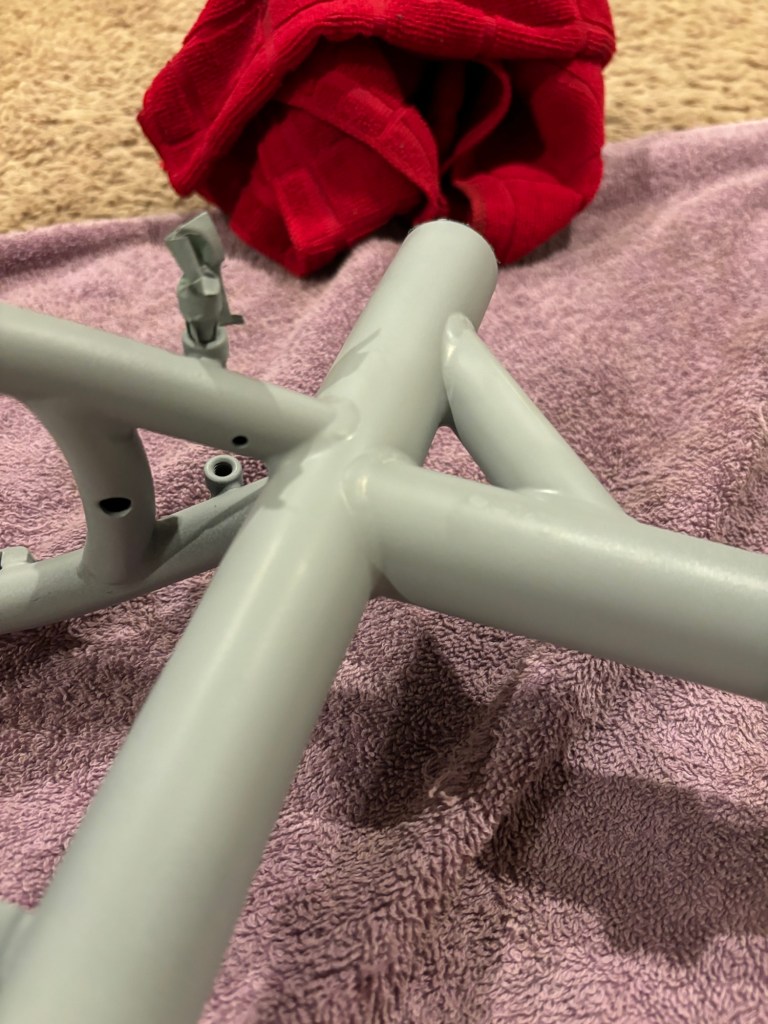
Second step is WET sanding. I personally did not sand my frame down to raw metal as you can see but the first step in sanding is taking off at least the gloss coat (what makes the paint “shine”). The next step is making sure any scratches or gouges on the frame are smooth to the touch and rust has been sanded away to show only raw metal. I started with a 160 grit and worked up to 600 grit (smaller number is rougher and will take off more material: 160, 240, 400, 600, etc.) specifically on the areas that needed a lot of love and till I could rub my hand along the frame without looking and not feel (or close to not feel) the scratch or gouge.
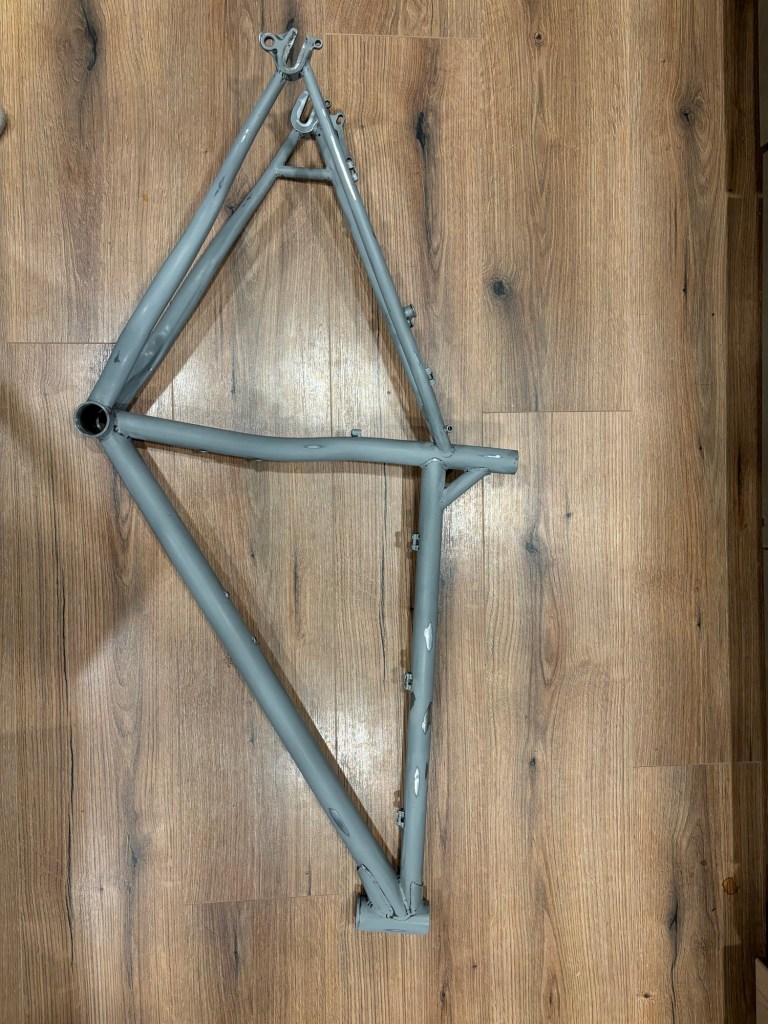
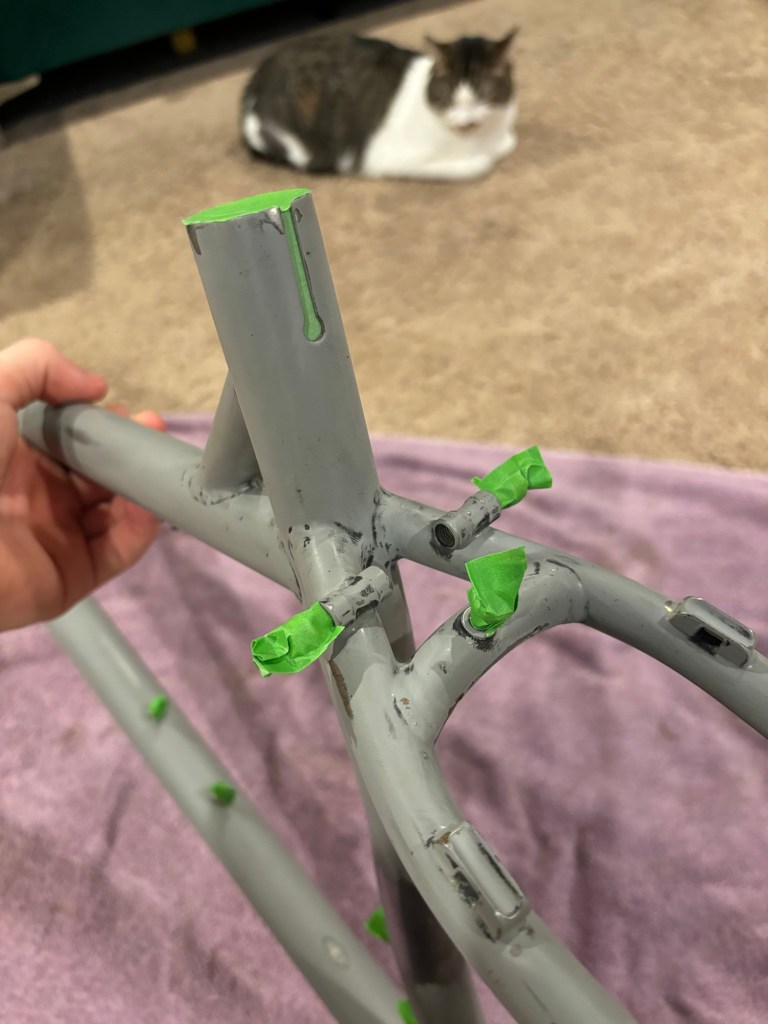
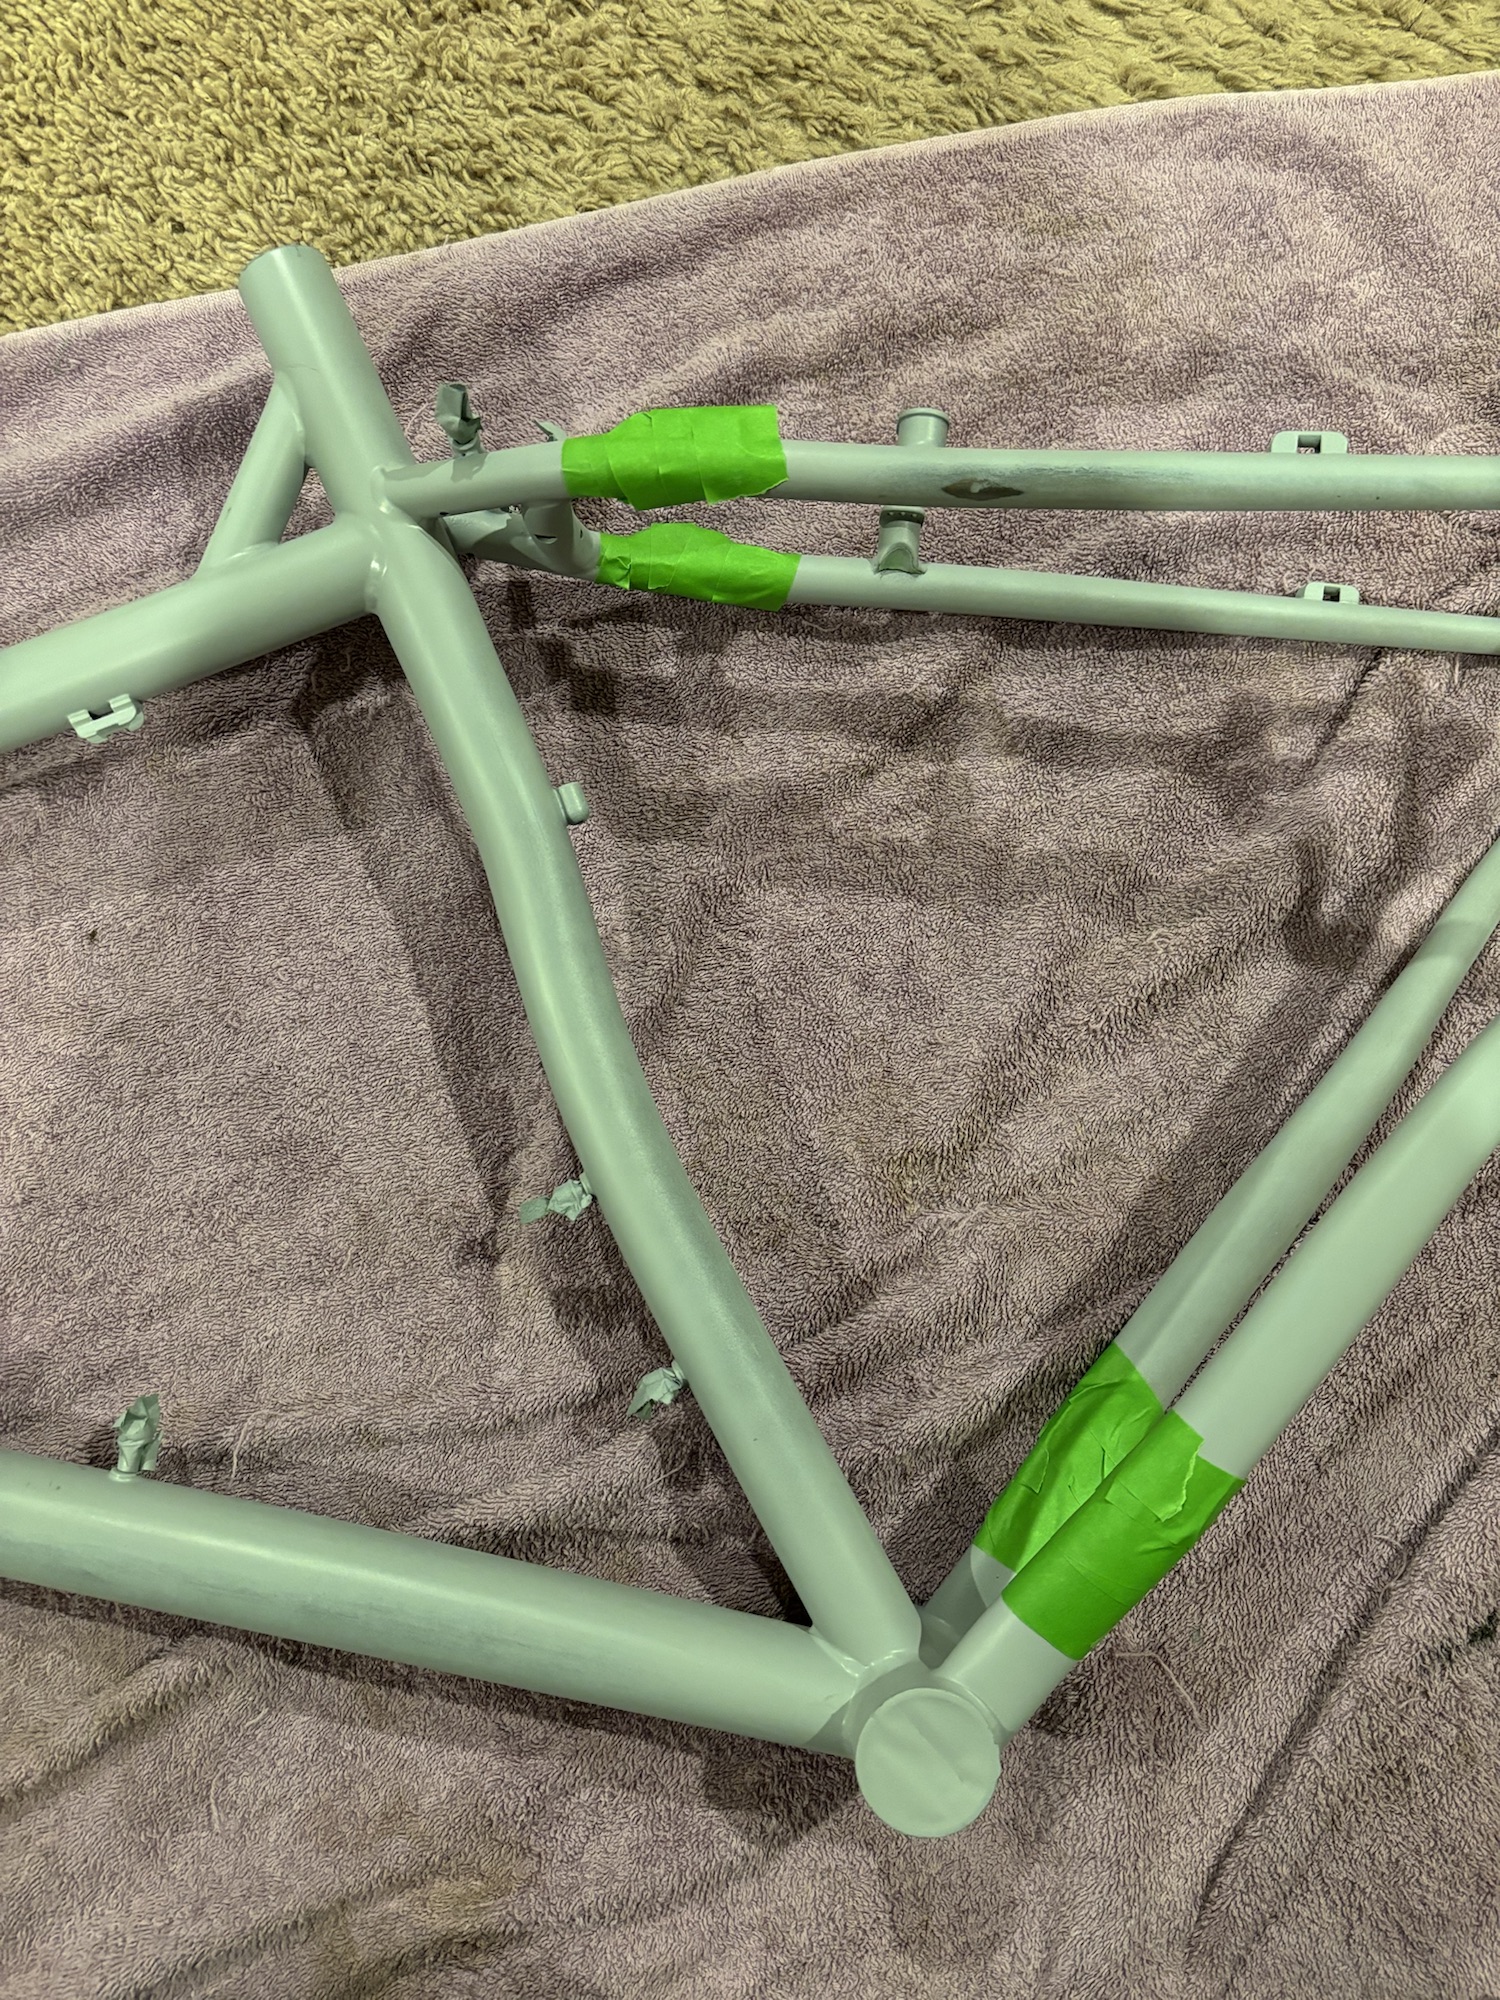
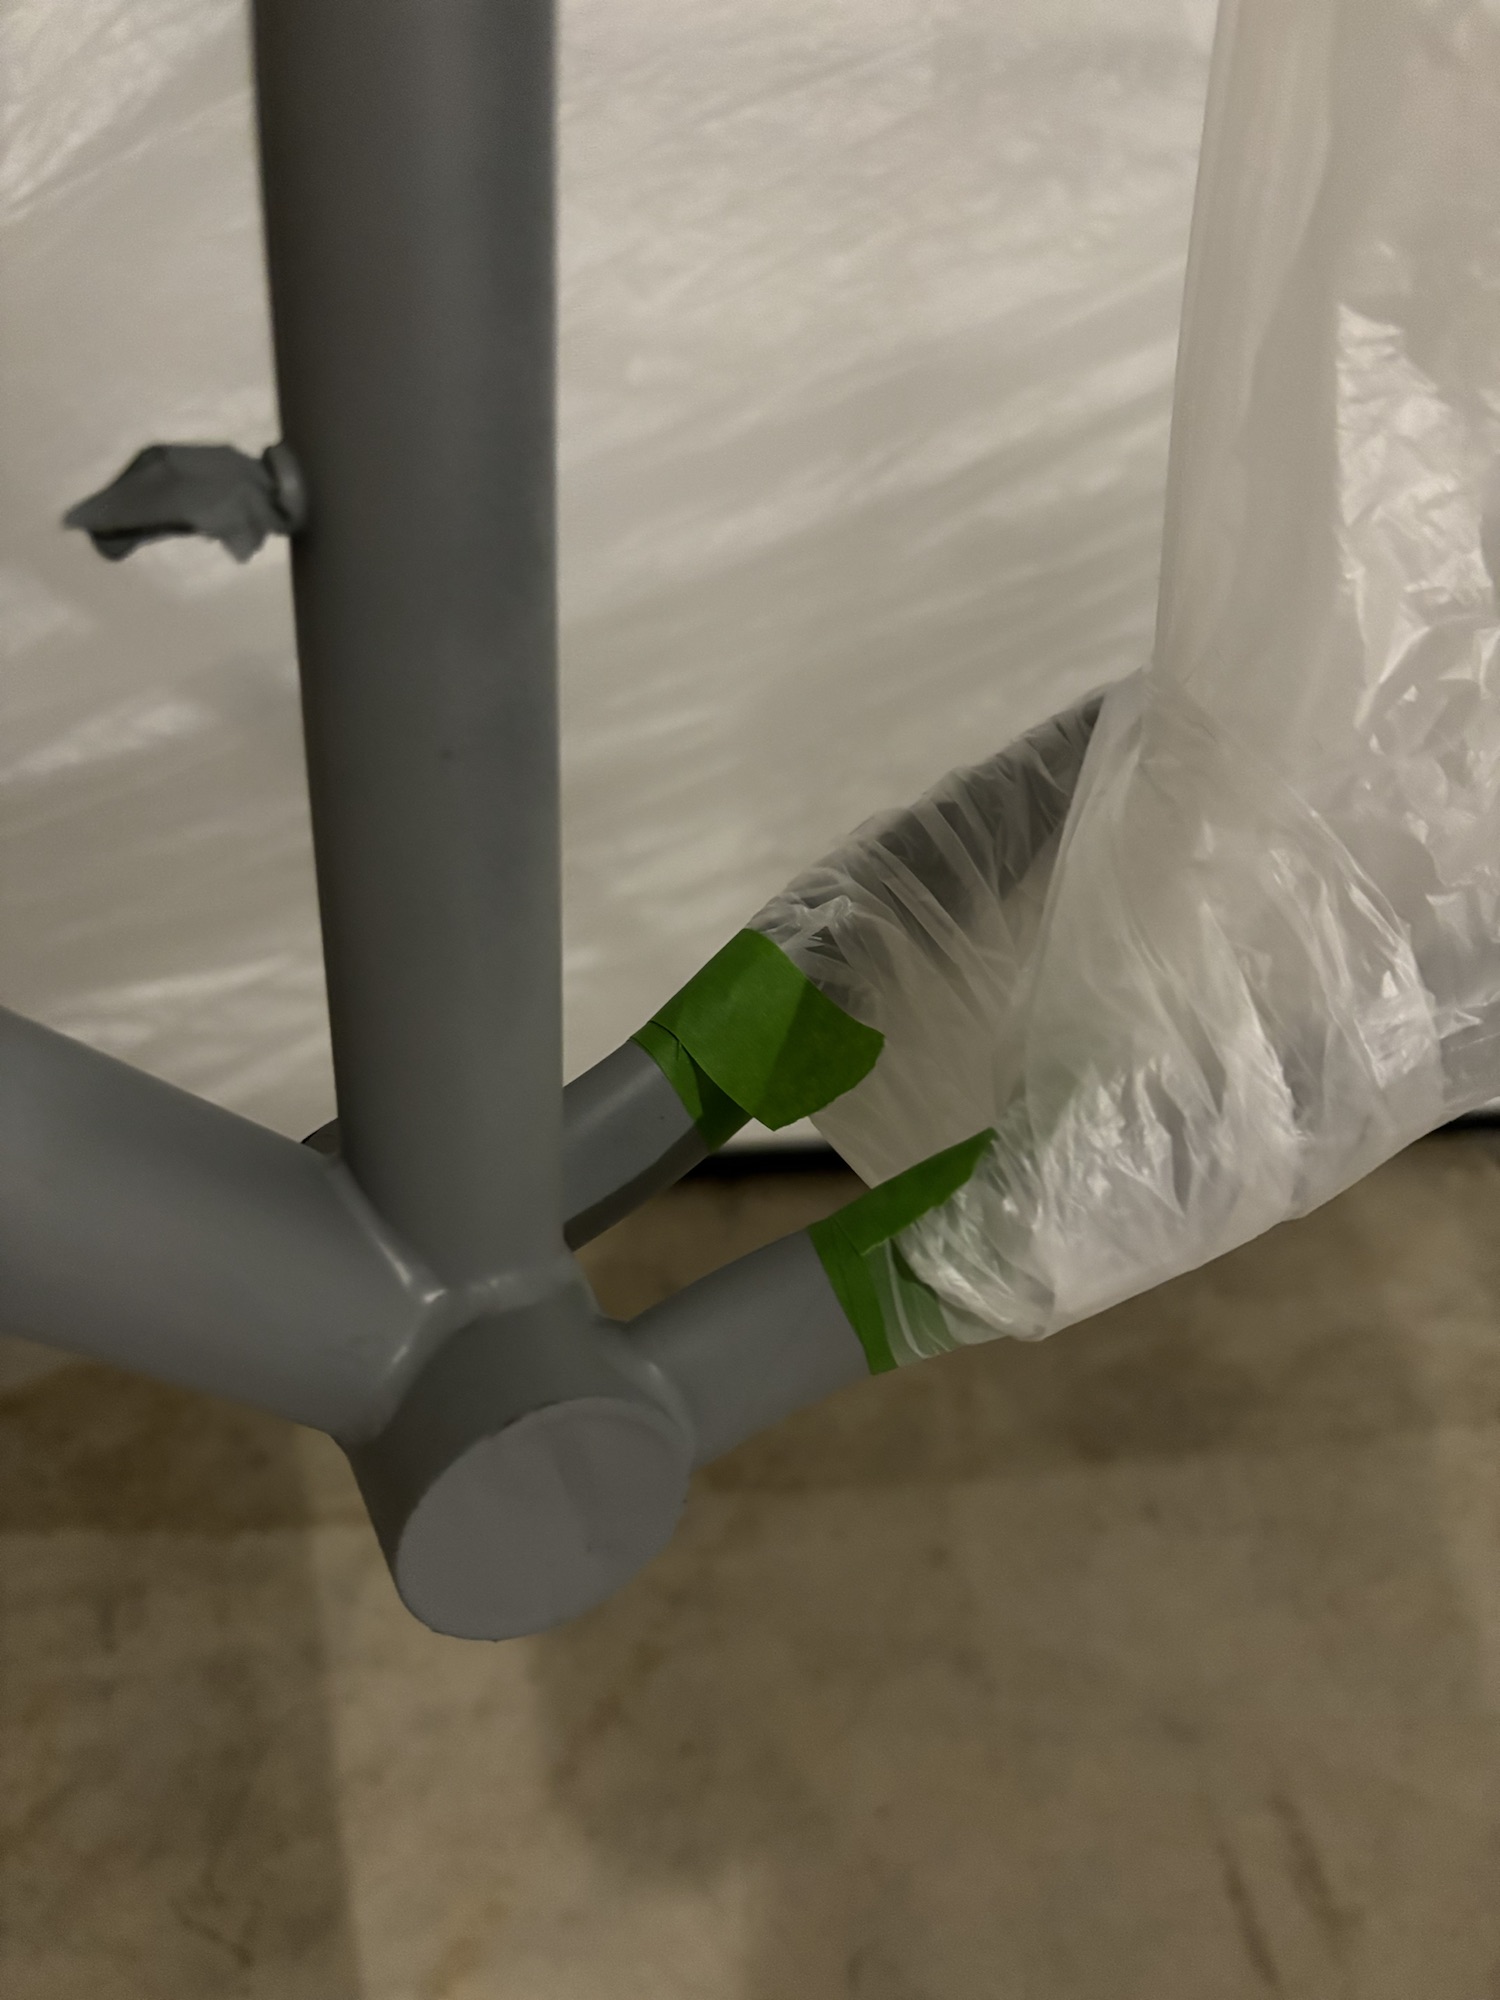
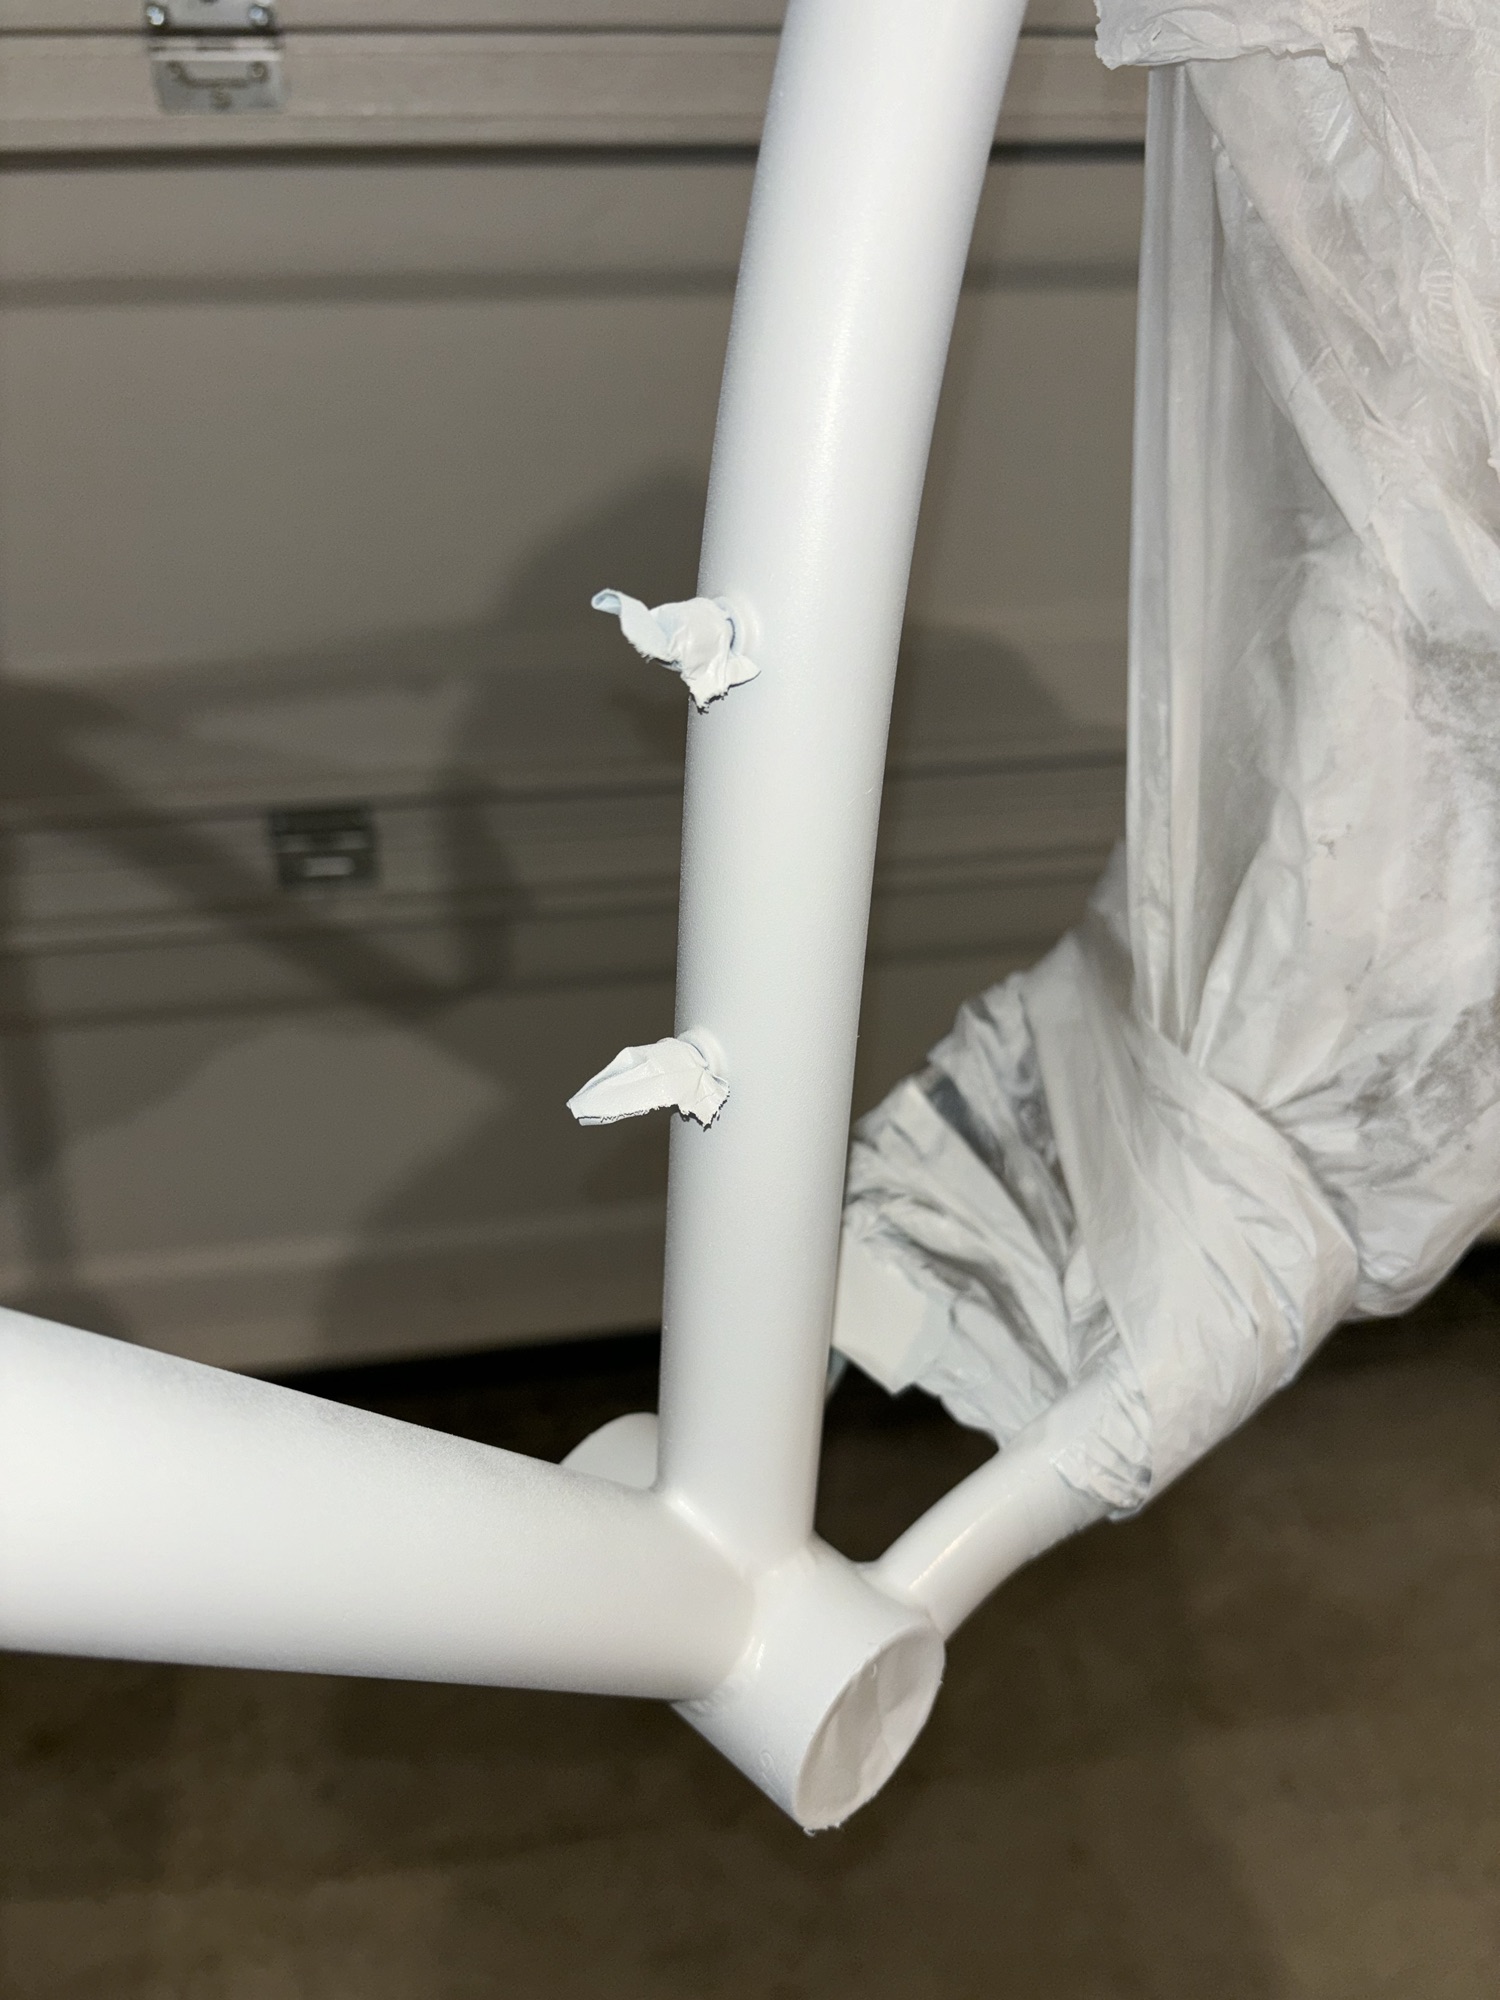
Now for arguably the most important part of prep. Taping off areas like: head tube, seat tube, bottom bracket, any threaded hole, etc. If these areas are not taped off properly or at all and then painted over you may not be able to fit your parts back in so make sure to do this right. There really is no info/videos that I could find directly showing how to tape off a bike for DIY painting. Like me, you will need to watch a couple generic bike painting DIY videos and in them you will see the YouTubers tape off their bike. From there you can emulate how they do it (and from my photos) and should be able to figure it out!

Finally after taping off the frame the final step right before priming is to wipe down the bike with rubbing alcohol and a clean rag to get as much dirt, oil, and dust off as possible to help the first coat be contaminate free and lay down smoothly!
Primer
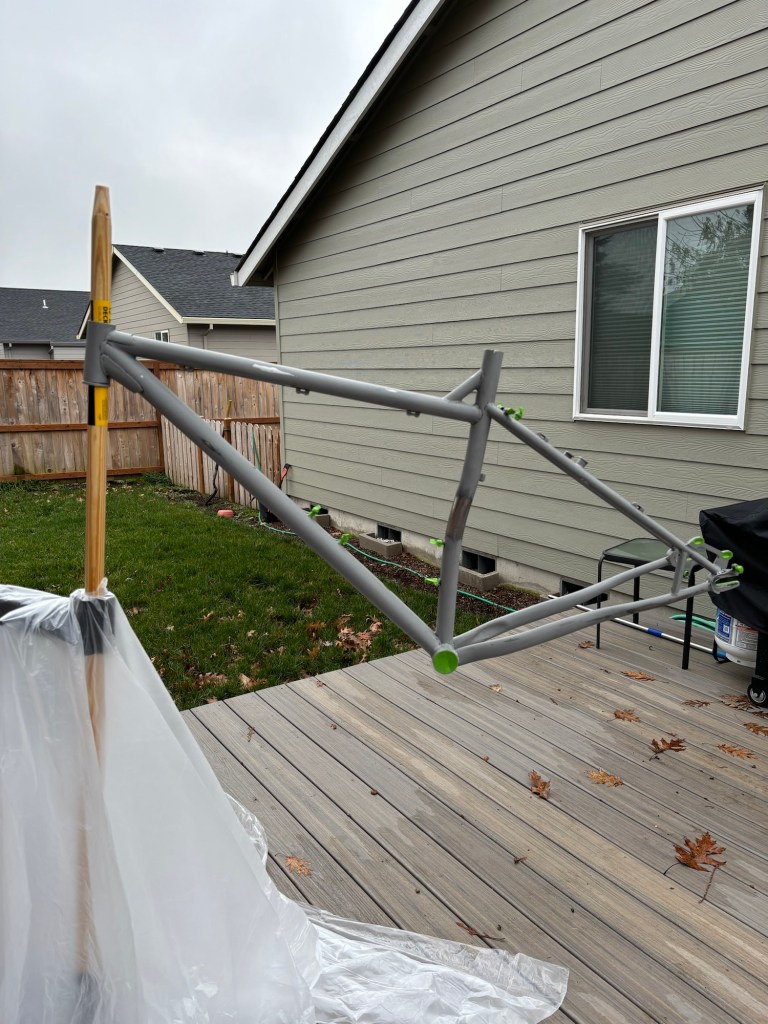
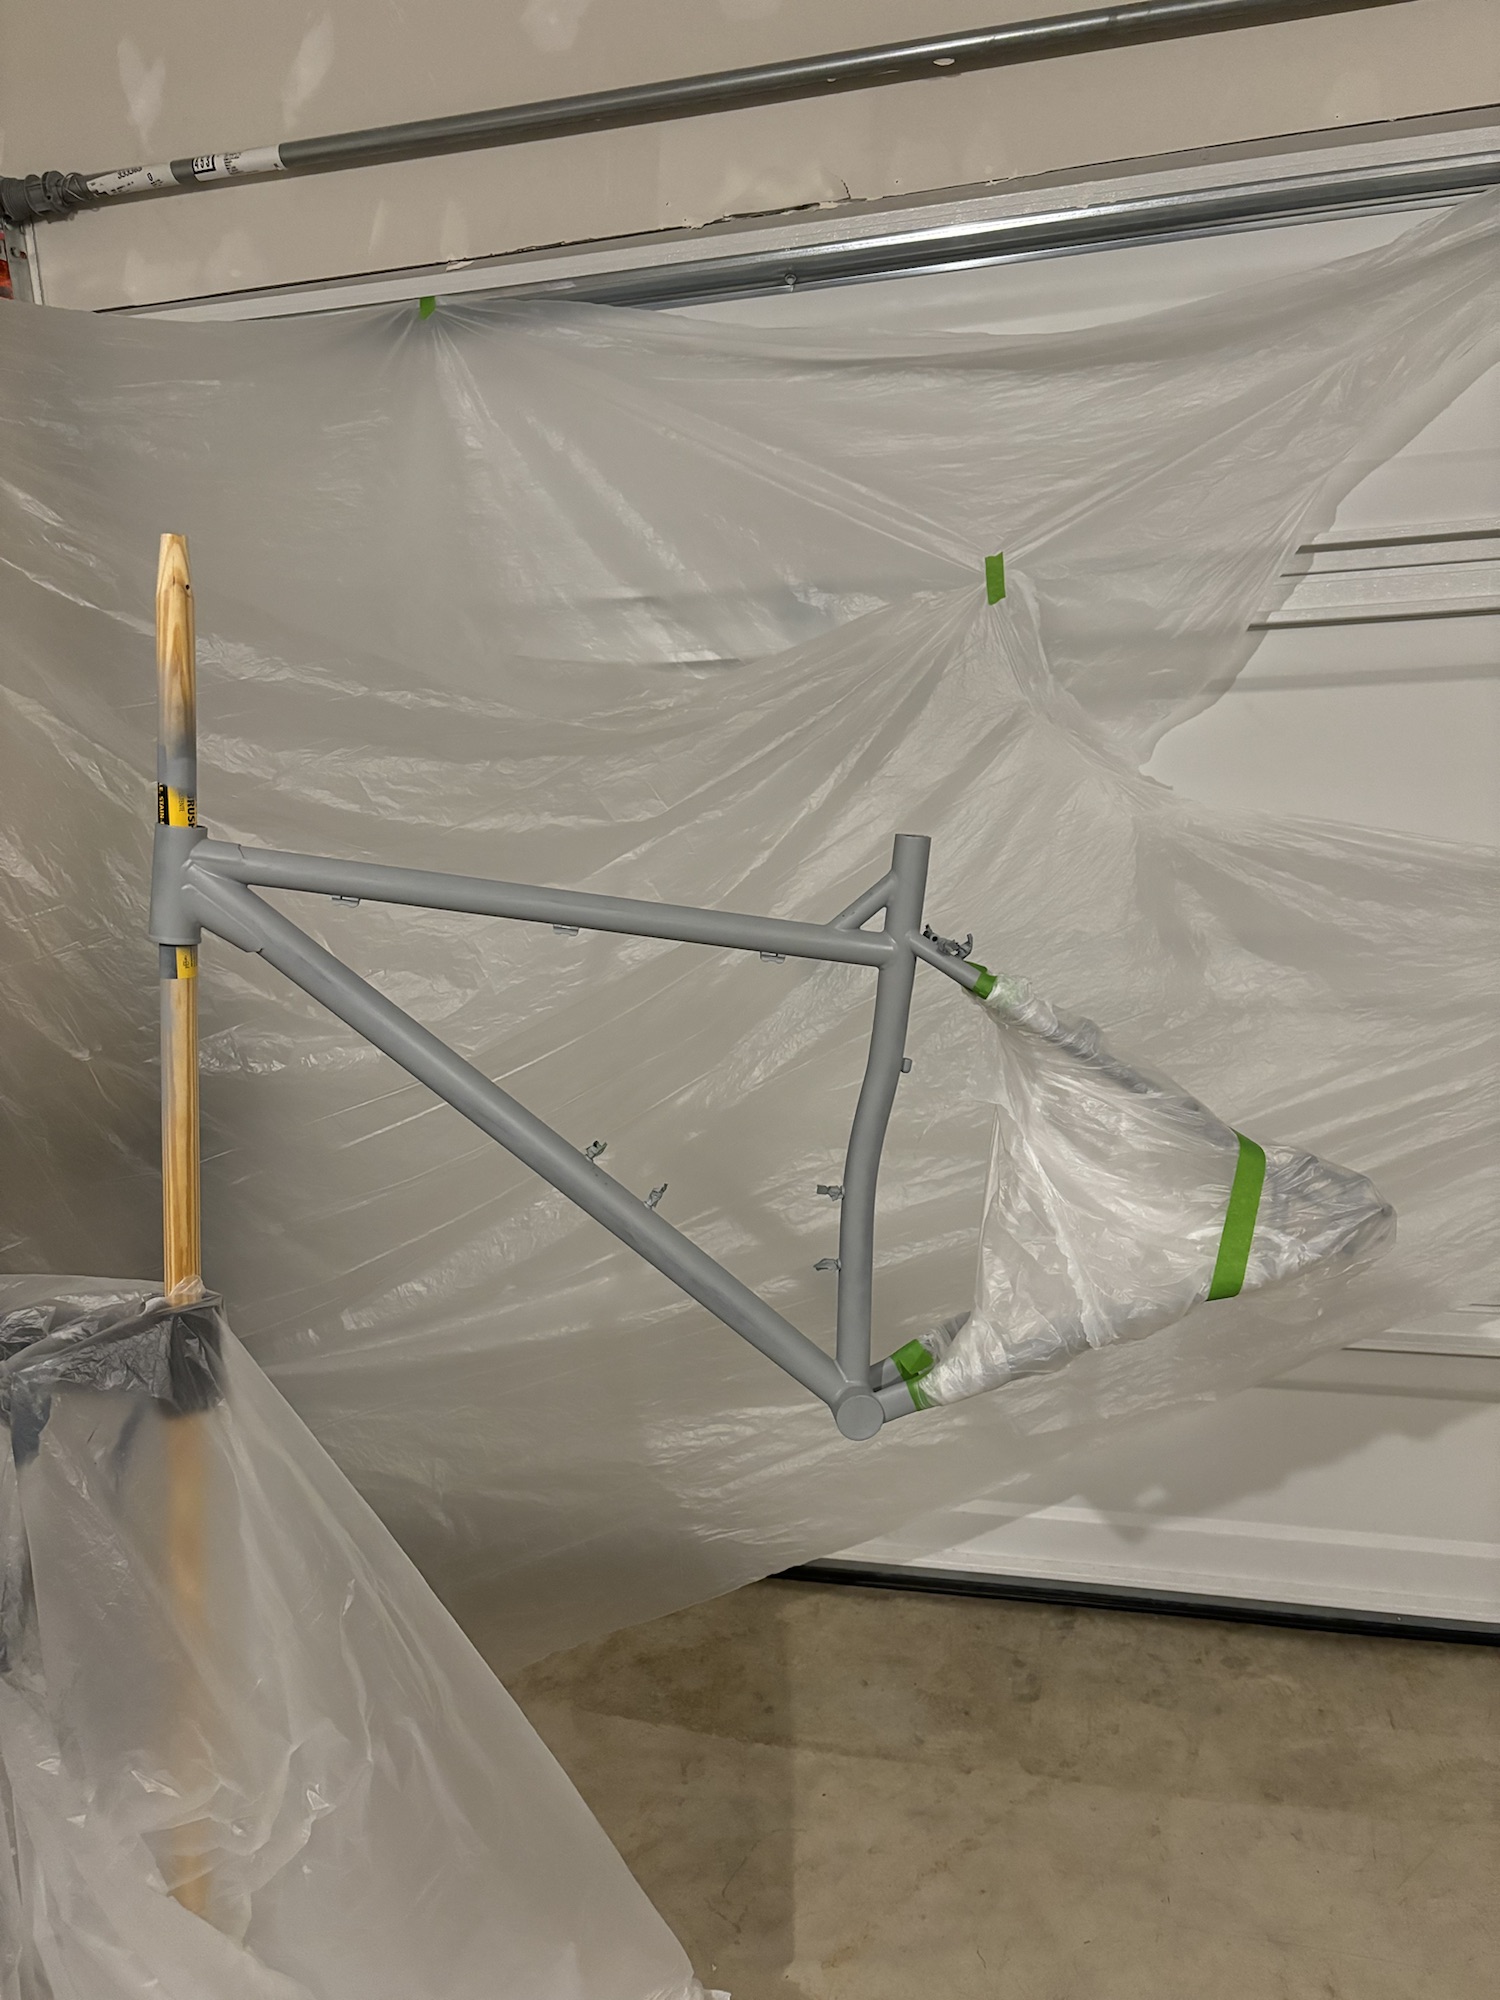
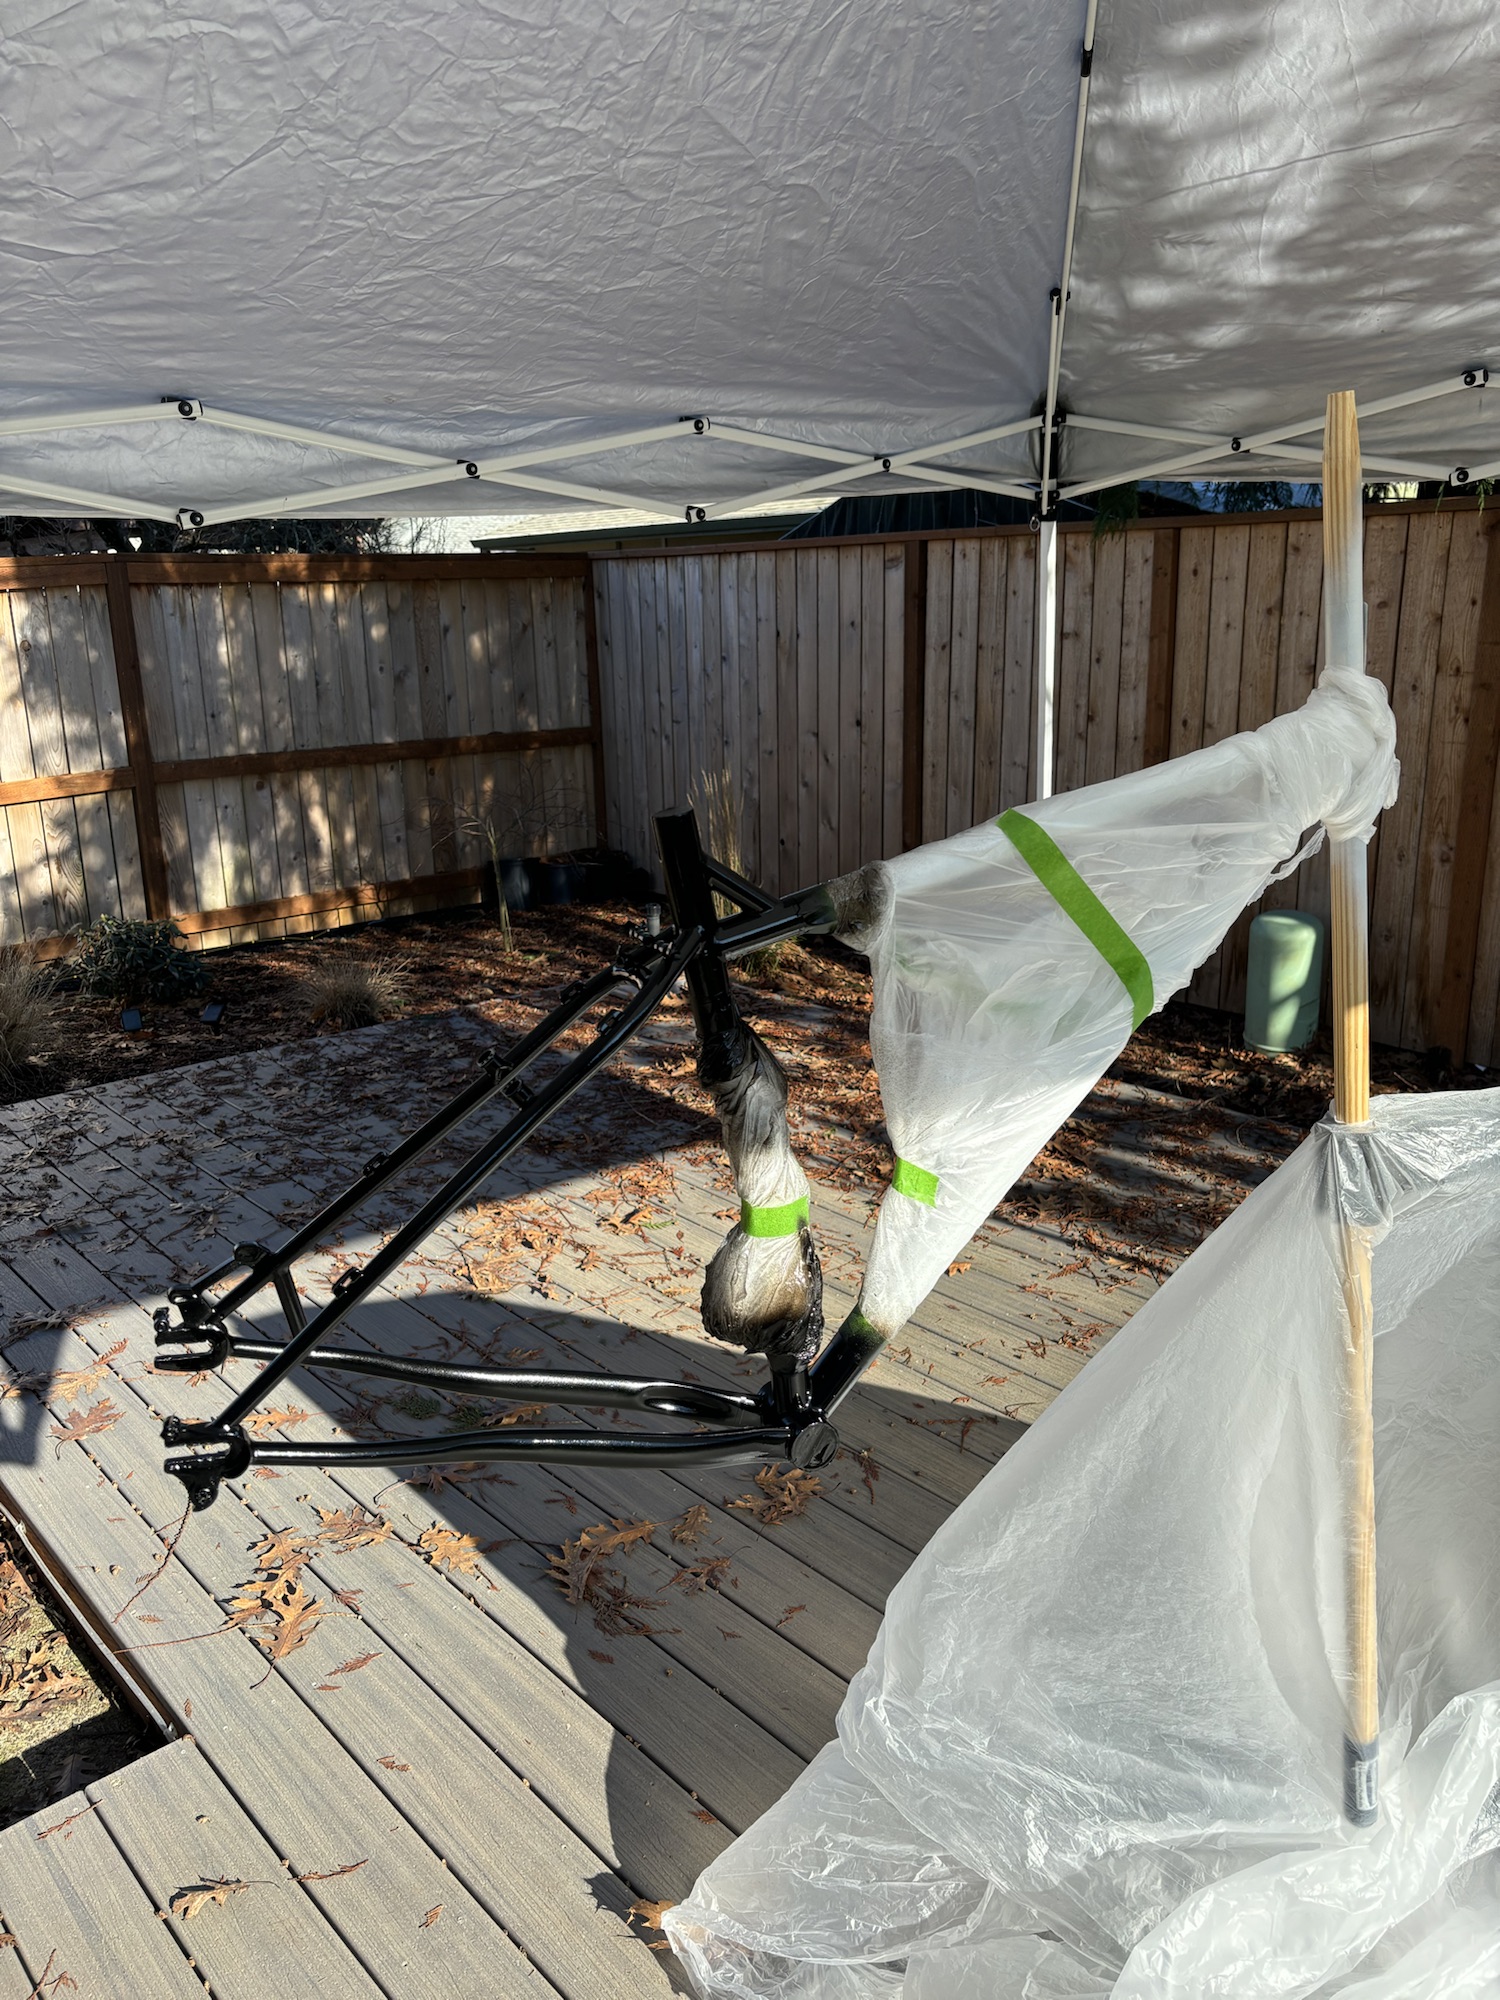
There are a couple ways you can go about setting up your frame to be painted. Tying strings to hold it up is a common trick people try but I think it’s a recipe for disaster. I found using a broom (or shovel, rake, etc) handle clamped onto by a bike stand works wonders! Not everyone has a bike stand so a good work around is using a pallet (can be found for free all around town) and drilling/cutting a hole the circumference of the broom handle into the top of one of the pallet boards and then sticking the pole into that. Then you’ll be able to “hang” the frame like I do in the pics below.
Typically for a bike frame, one can of paint is enough for each layer or step in the process, you should be able to get at least two to three full coats without running out. I say this because my cap got clogged on my first can of Montana Gold spray paint (which never happened again to my other three cans) and I thought it ran out and went and bought another can… total fail.
The best advice I saw or read when researching was “to never stop moving your arm or spraying the paint until you have cleared the bike”, the idea is that you’ll never be able to stop moving and release the spray nozzle at the same time, because of that you will cause a buildup of paint and the paint will run! This is also the case for holding the can too close to the frame. While holding the can and spraying too far away leaves misty looking or splattered coverage.
It is basically a not so fun dance of staying just close enough while moving just fast enough and starting/stopping off the frame all to ensure your spray paint job looks “perfect”. (:
I will talk about it more in my price breakdown, tips, and final thoughts section but Montana Gold spray paint is amazing. I have used cheap spray paint on other projects and going into this was very worried about how hard it would be to get a consistent coat, well, I am worry free now because I never had an issue with the paint running!
Wet Sand… Again
Thankfully the first attempt you’ve made at painting gets to be sanded away again so any mistake you made will be invisible soon! While using 600 to 800 grit feel the frame for any rough areas (feels like concrete) or high spots (smooth but a visible bump) in the paint. Make sure you are keeping the sandpaper very wet to limit friction, and going in light circular motions until again the frame is smooth enough you don’t notice the difference in feel when not looking.
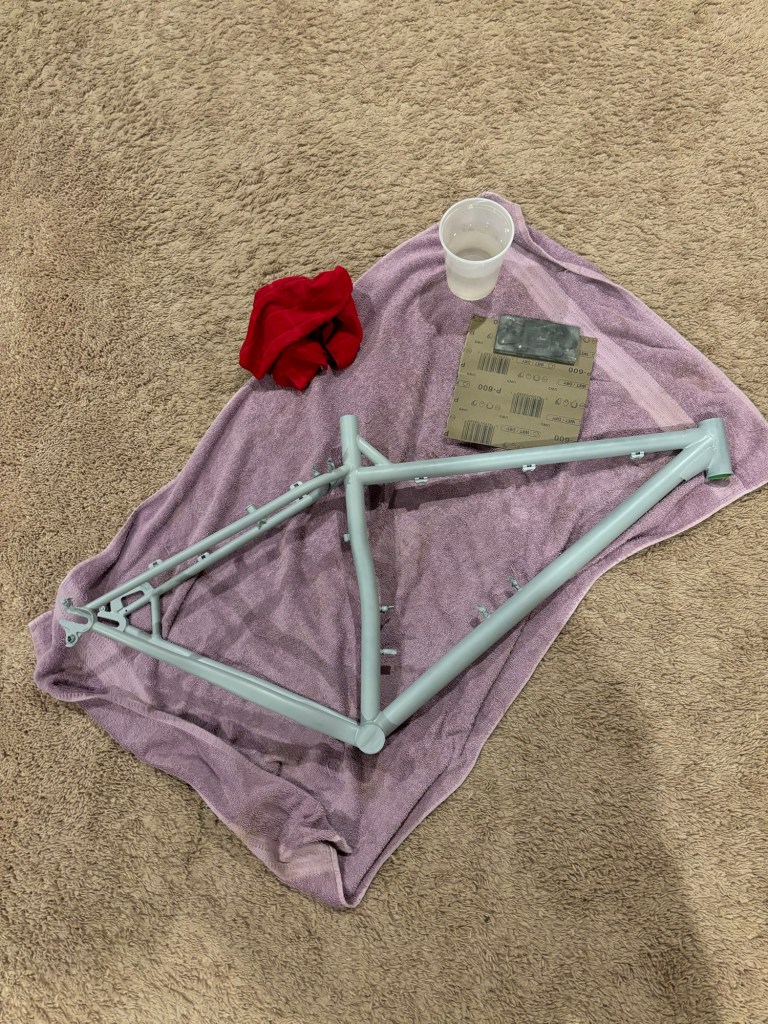
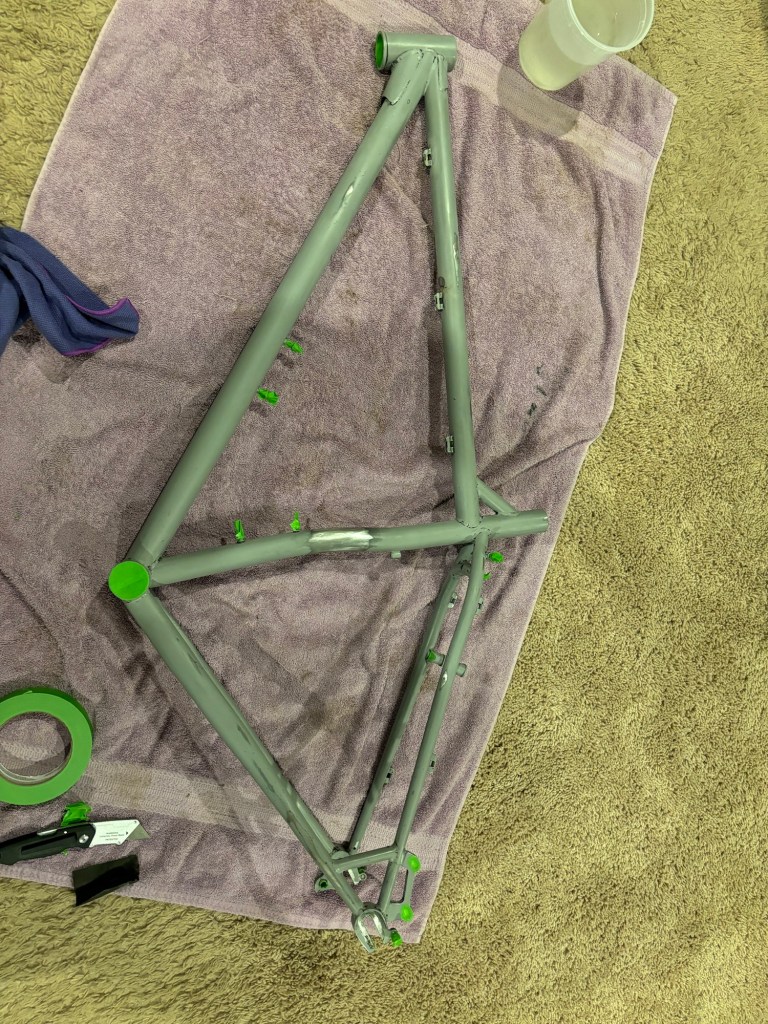
If there are any spots you now notice are not covered enough feel free to go over again with primer. I personally did not have any spots like this so I went onto the next step, painting.
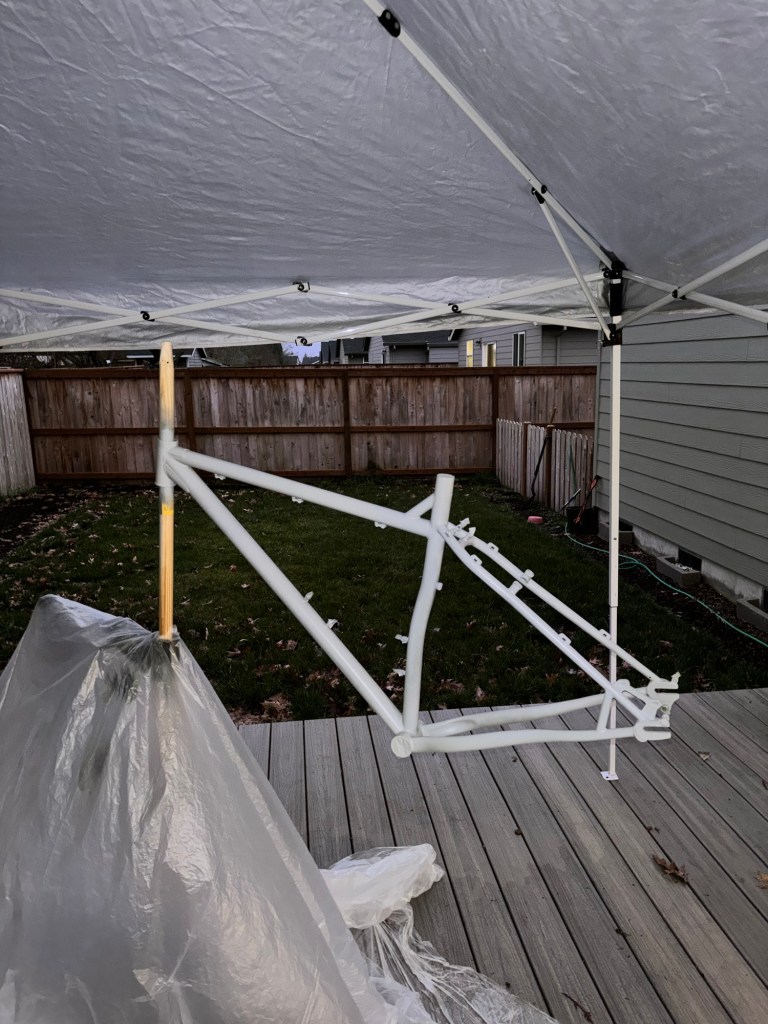
Paint
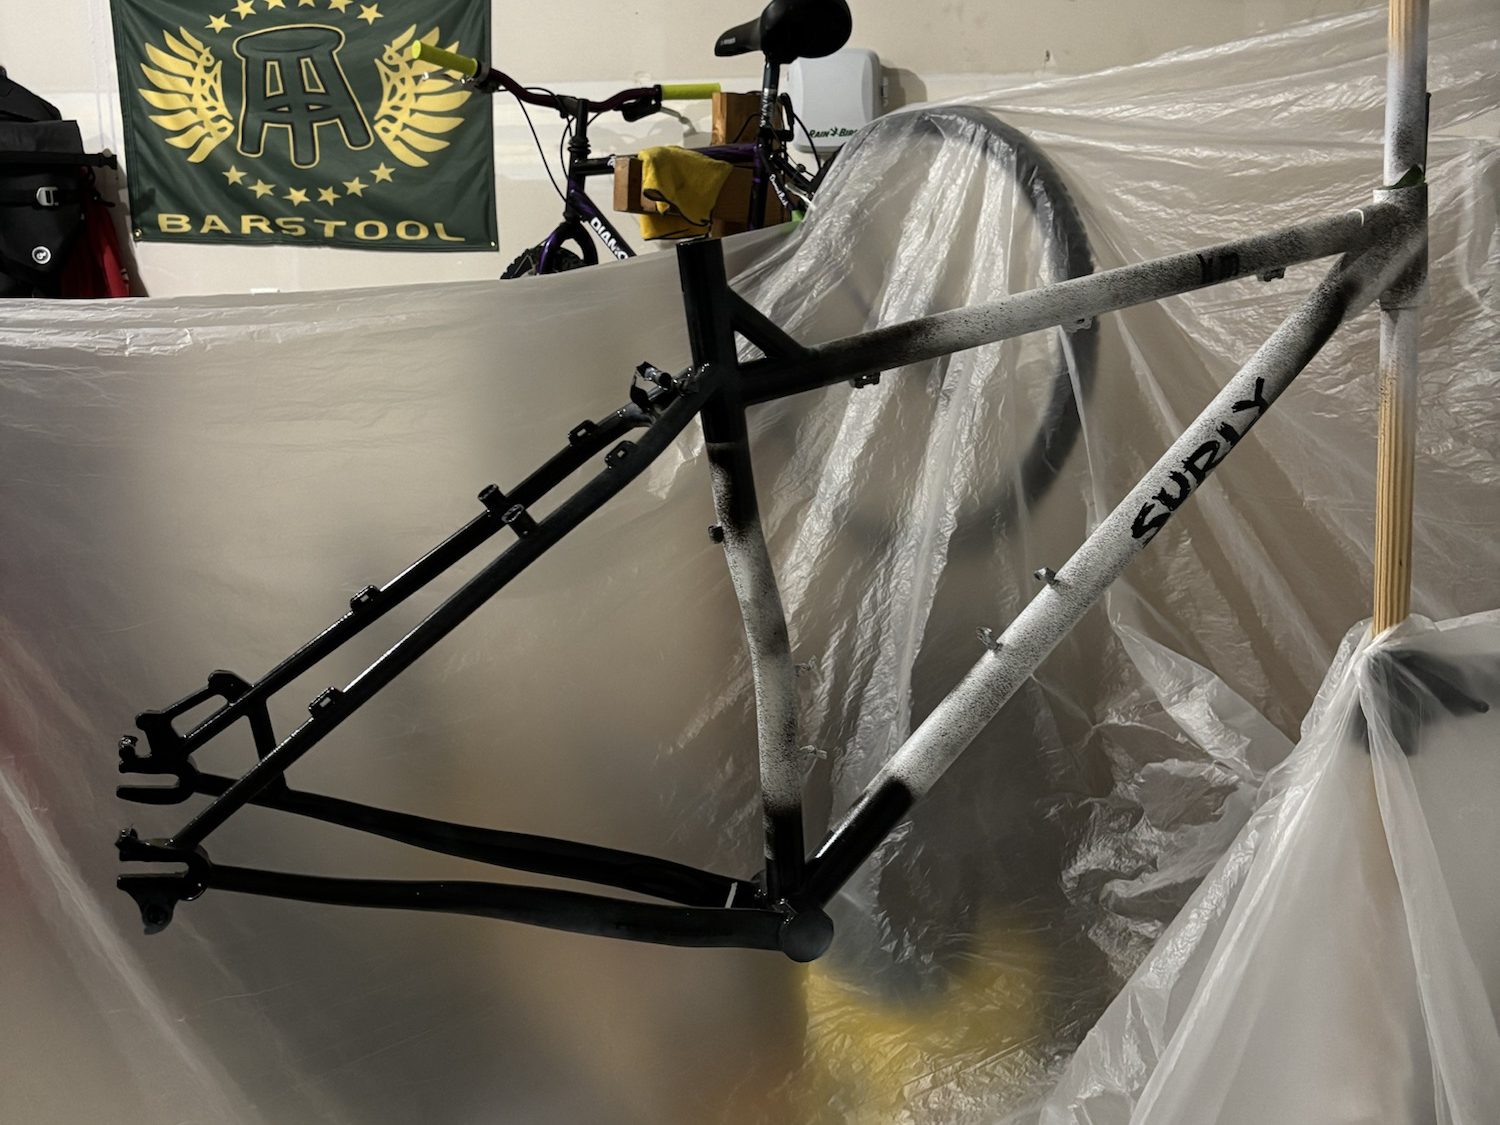
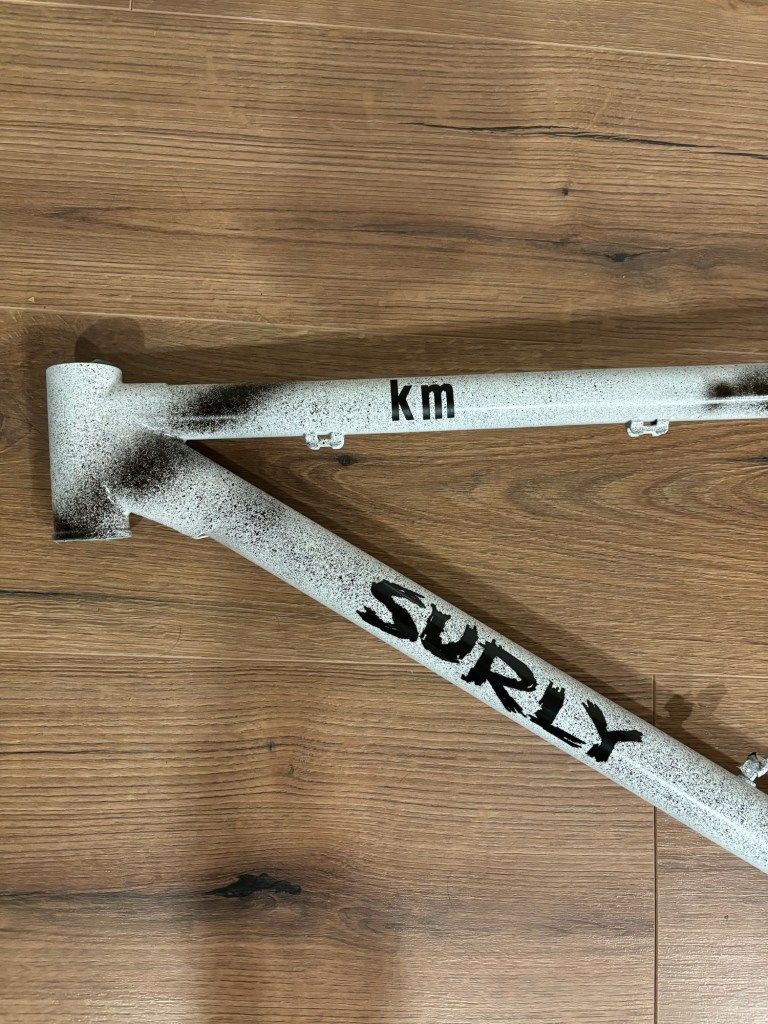
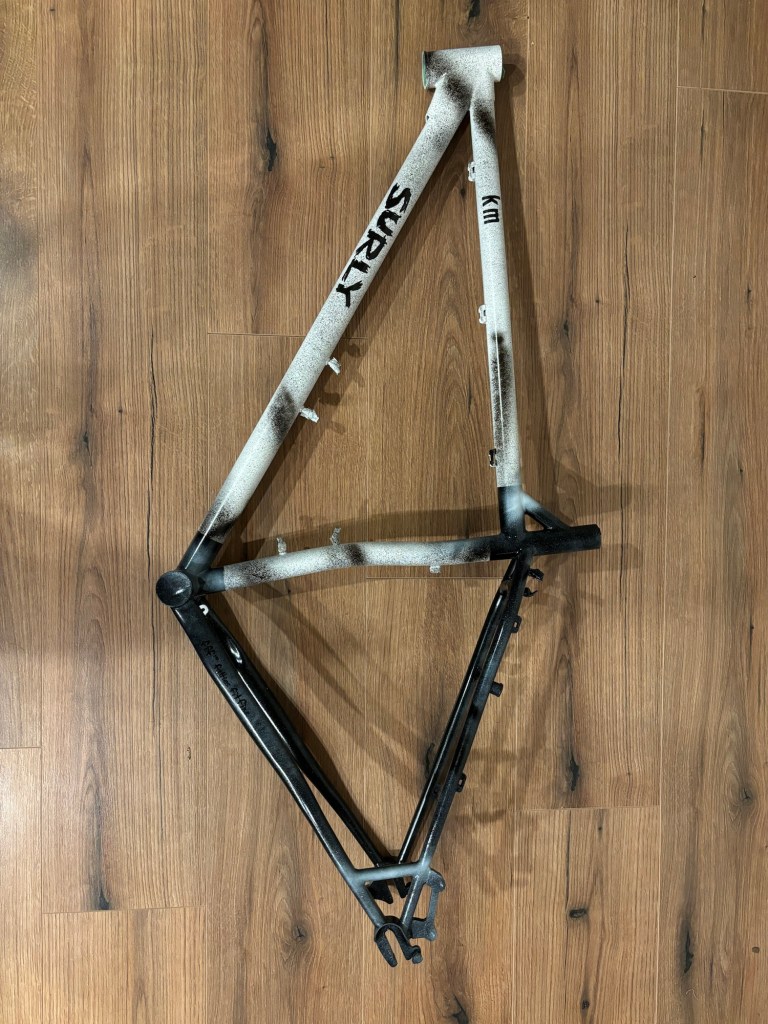
Now this is where the real fun and customization begins but also where you can start messing up the nice work you’ve done so far (no pressure). There are a lot of directions you can go! Single solid color, or two opposite colors or even go crazy by flicking paint at the frame or using a sponge to speckle it. Another cool option is to add stickers/stencils to leave designs or patterns, I for example did a L and C in the inner chainstay for my partner Lola and daughter Colette.
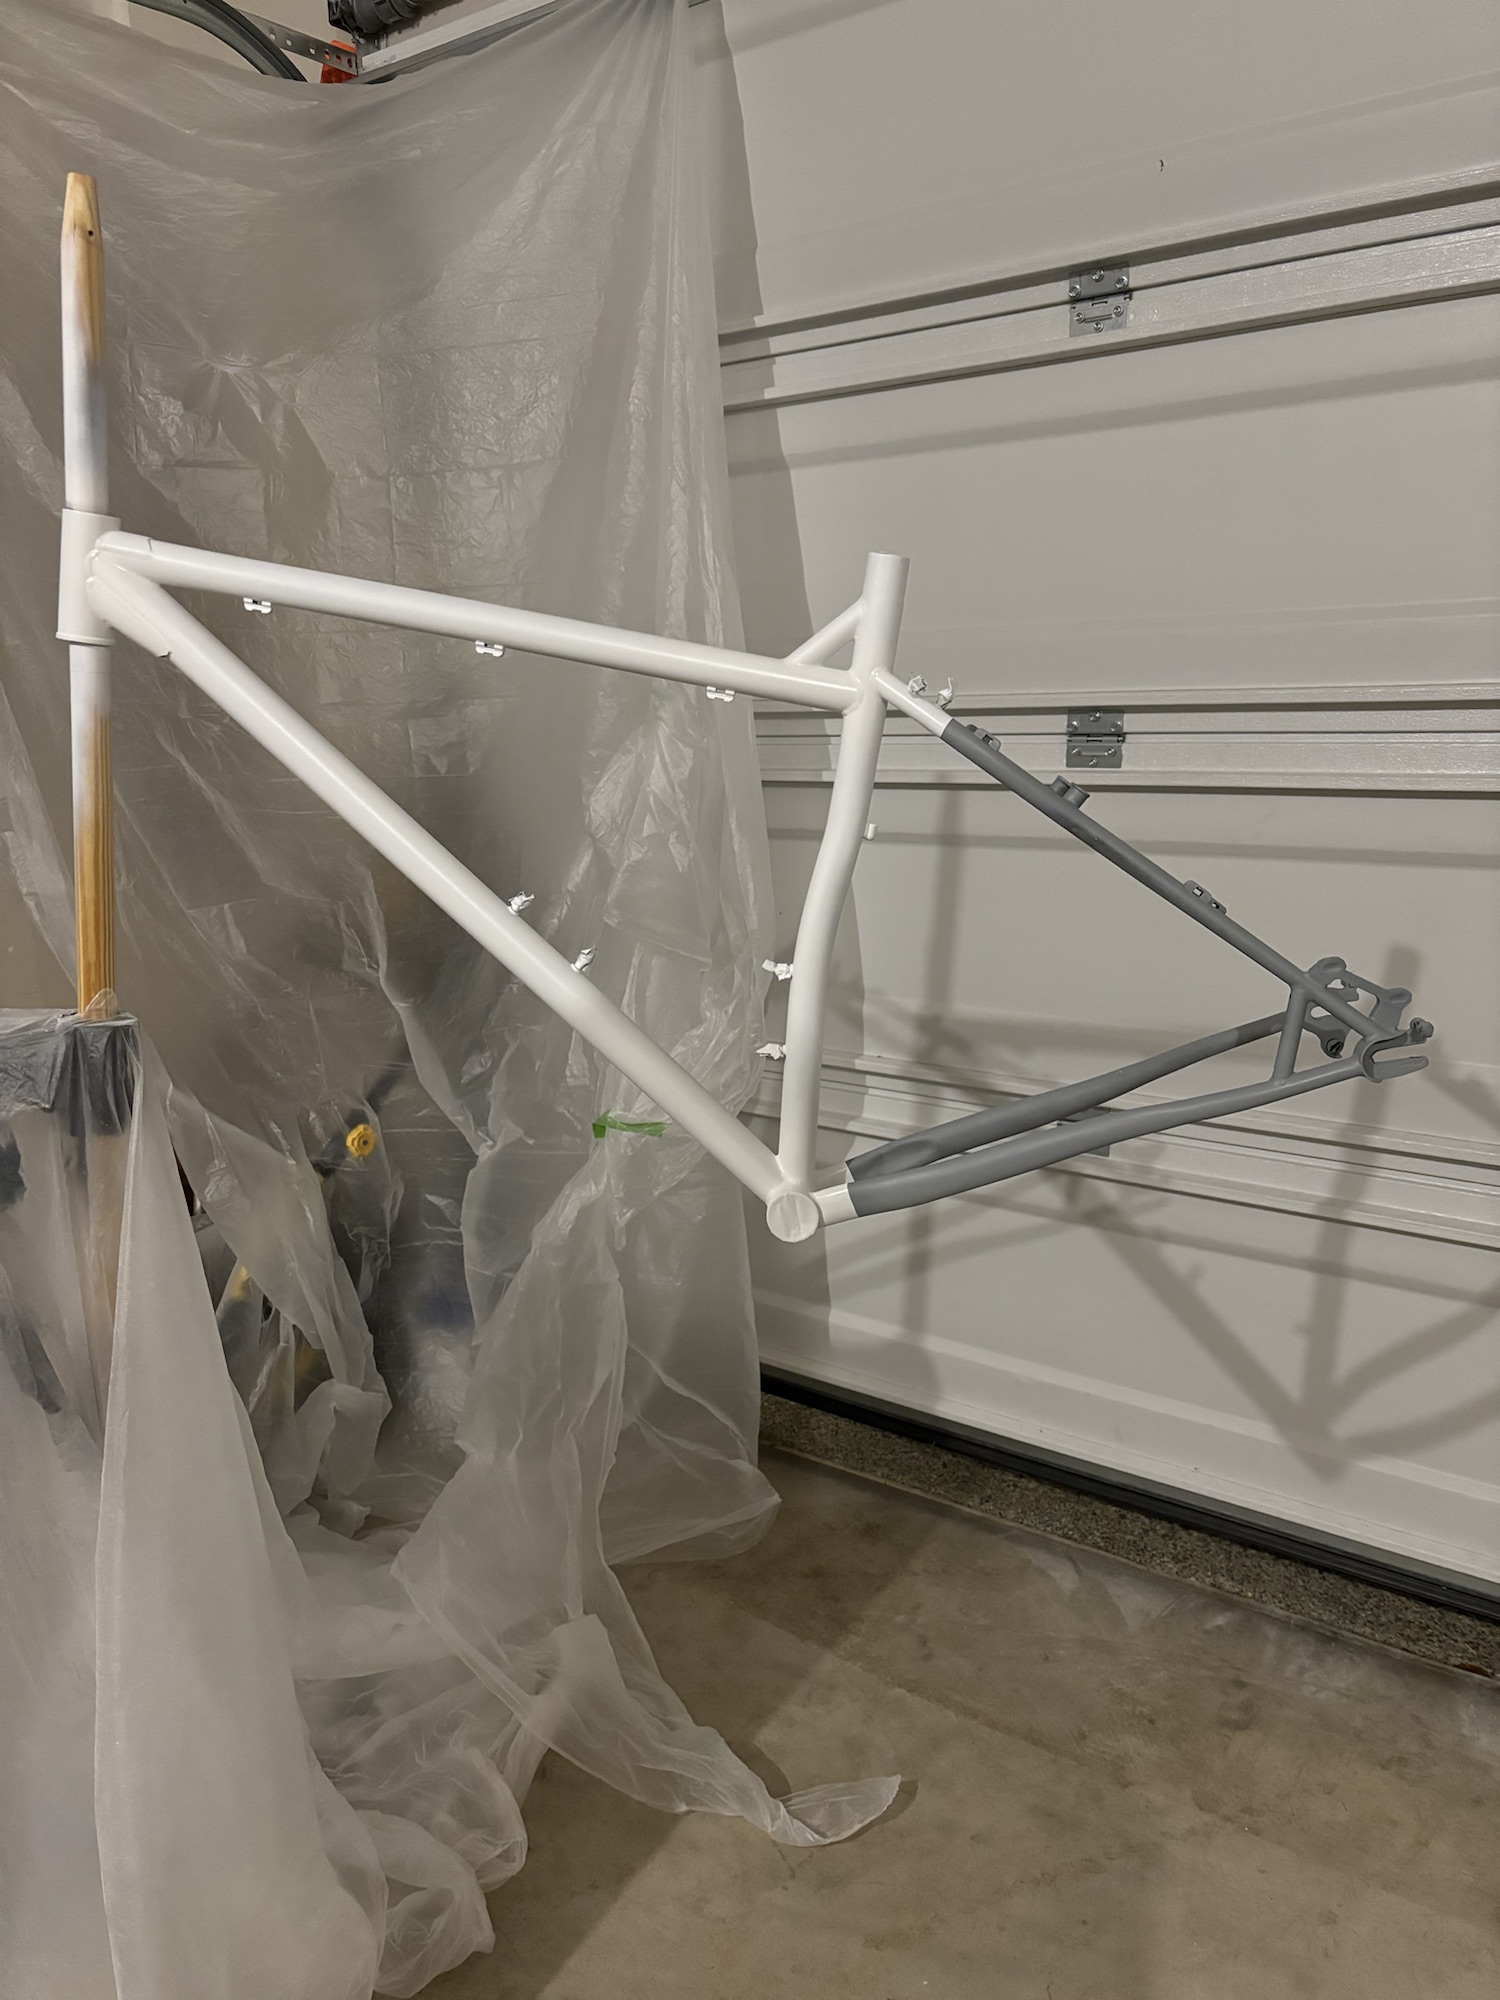
As you can see in the images I did a two-tone black and white design. Aside from having to tape off half the bike at a time and use two colors instead of one (so twice the effort) it was fairly straightforward but here is where I made my mistake. The black flakes of paint that dried to the bag fell off onto the white section of frame and stuck and dried to the point I couldn’t scratch it off! Like I said, sometimes you’ll have to make a change on the fly, so instead of leaving the small black mark on the white section, I decided to do an inverted speckling (white specks on the black section and black specks on the white section). To be clear I could’ve tried to fix it by sanding down the area, painting back over it and then going from there but then that could bring its own list of issues.
Gloss
With your bike (hopefully) transformed to your liking it is time to preserve and protect all of the effort you just put in! Only thing left to consider is if you want to seal any stickers or decals to the frame. Logo decals are pretty easy to find online and if put on before the gloss coat will look and feel like it does out of the box.
The key with the gloss coat is to lay one or two solid coats to cover the frame for protection and one more final coat to make it “shine”. What I mean is, if you hold the can just a little closer and spray it thicker (but not too thick, it’s a dance remember) then you will get a nice mirror effect that looks almost professional!

Primer and paint you can get away with letting it dry for only 6-12 hours before moving on to the next stage but a gloss coat will take AT LEAST 24-48 hours and may have some spots that are slightly sticky (meaning gloss coat is not fully cured). Wait until it is smooth to the touch and doesn’t stick to paper if you touch it against the bike. Once that has happened you’re done!
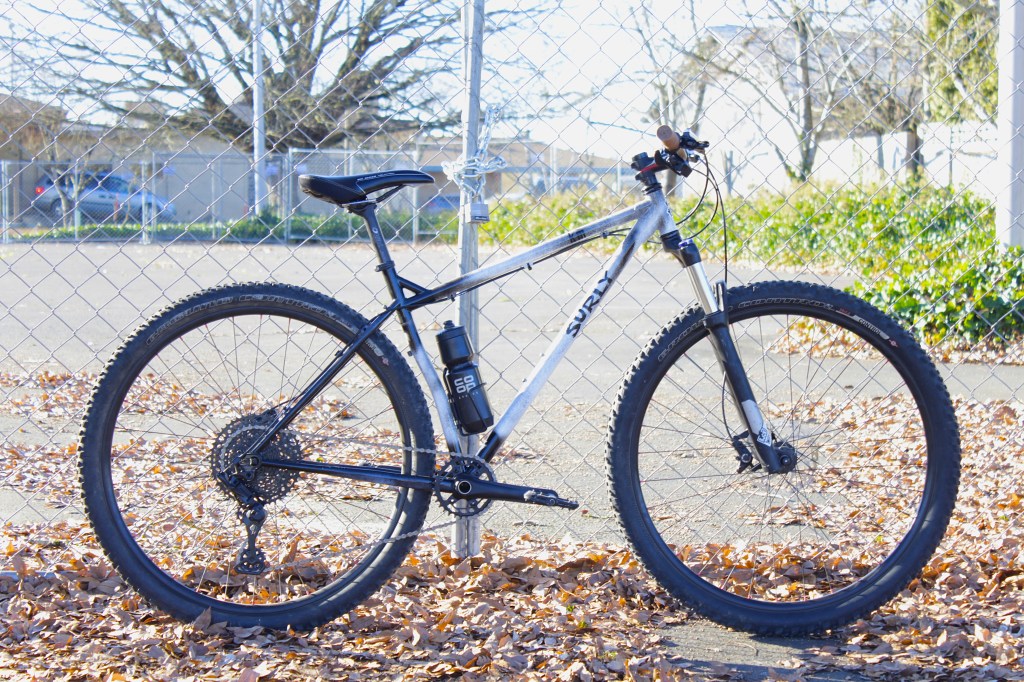
Complete Build Photos
Now that your hard work is done it is time to build the bike back up and admire the fruits of your labor!

Price Breakdown, Tips, and Final Thoughts!
Price breakdown for materials and products used is as follows:
- (1x)Montana Cans Gold Spray Paint – Iron Curtain – $13.99 (Michael’s)
- (1x)Montana Cans Gold Spray Paint – Shock White – $13.99 (Michael’s)
- (1x)Montana Cans Gold Spray Paint – Shock Black – $13.99 (Michael’s)
- (1x)SprayMax 2k Glamour Clear Coat – $20.99 (Amazon)
- (1x)Gerson P95 Maintenance-Free Dual Cartridge Respirator – $18.99 (Harbor Freight)
- (2x)Plastic Drop Cloth 9’ x 12’ – $1.49 (Ace Hardware)
- (1x) Assortment of Wet Sandpaper 60-600 grit – $9.99 (Ace Hardware)
- (1x) Frog Tape .94 in x 64 yd – $6.49 (Walmart)
- (1x) Hyper Tough Exacto Knife – $6.94 (Walmart)
Grand Total: $108.35
Side Note: the bike stand I have I got at my LBS used for $50. I am obviously not including it in there because I gave another option (got that idea from ETOE who shows it’s doable) but the point is a bike stand is fairly cheap and can make a huge difference.
Tips
If, out of the massive wall of text I have written you only absorb one thing let it be this – Montana Gold spray paint is the best spray paint I have ever used and I will honestly if possible only use it for future projects. It’s an acrylic paint so it binds really well to whatever surface you are spraying but more importantly is low pressure so it comes out really soft. This means you can do a really cool mist effect far away, get solid coverage from six to ten inches away and within two to three inches get a really nice finishing coat (or “shine” I talked about earlier). They also have over 100 colors to choose from and a couple of weird ones like glow in the dark, reflective, etc.
When applying any kind of spray paint (primer, paint, gloss) the coats will usually dry enough within 10 to 15 minutes for you to apply your second or third layer (could do more but usually not necessary). For the best coverage go in opposite directions for each layer: horizontal sprays for one layer, vertical for the next and alternate back and forth. If you’re thinking “dang, I cannot get this area to cover well!” Try this tip and I promise the area will instantly be saturated.
Primer paint is usually “normal” paint but with added chemicals or properties for things like rust protection, or added viscosity so it sticks really good to a specific material (think metal primer, wood primer, plastic primer, etc.). For me I am using the word to describe the first paint I laid down before my color paint layer. Montana Cans does sell a metal primer but since the bike was still mostly its original paint/primer and not bare metal I opted for their acrylic based paint. A big thing to pay attention to is the color of your primer. I will not explain it justice so look it up yourself if you care but just know if you’re doing a color you want to pop then the proper primer color is needed. If you’re doing a bunch of colors then grey is most likely the safest bet.
Small tip I learned about how to “tape off” threaded holes for water bottle mounts, front/rear racks, or anything else is to use a donor screw (one you don’t care about if it’s paint on it) and wrap tape loosely around it. Screw it in until the tape starts squishing into the frame! One of the photos in the Prep section shows a close up of this in practice if you are more of a visual learner.
Final Thoughts
Overall this experience was extremely fun and well worth the time and effort spent researching and doing it. I will preface by saying I love tinkering and making things my own so that is a big reason I enjoyed this so much. Hindsight being 20/20 I would caution anyone trying a pattern or design or multiple colors instead of a single color for the first time. Although I like the paint job there are things that could have gone better (big mistake that made me have to speckle it).
After going through this process I understand where the cost of a professional paint job comes from. Put simply, the “risk” of screwing up a paint job after spending 20-100+ hours of work and the knowledge of how not to do that is expensive (also eating the cost if/when it does happen and doing it over at no extra charge to the customer). If you want for example a period correct paint job on a rare vintage bike or a floral design on your custom made titanium bike it is probably worth going to a professional.
If, on the other hand, you’re looking to make a project bike feel more personal to you, cover up years of abuse on a daily rider, or just want to change the look of a bike in your collection then DIY is a perfect option for you!

Leave a comment